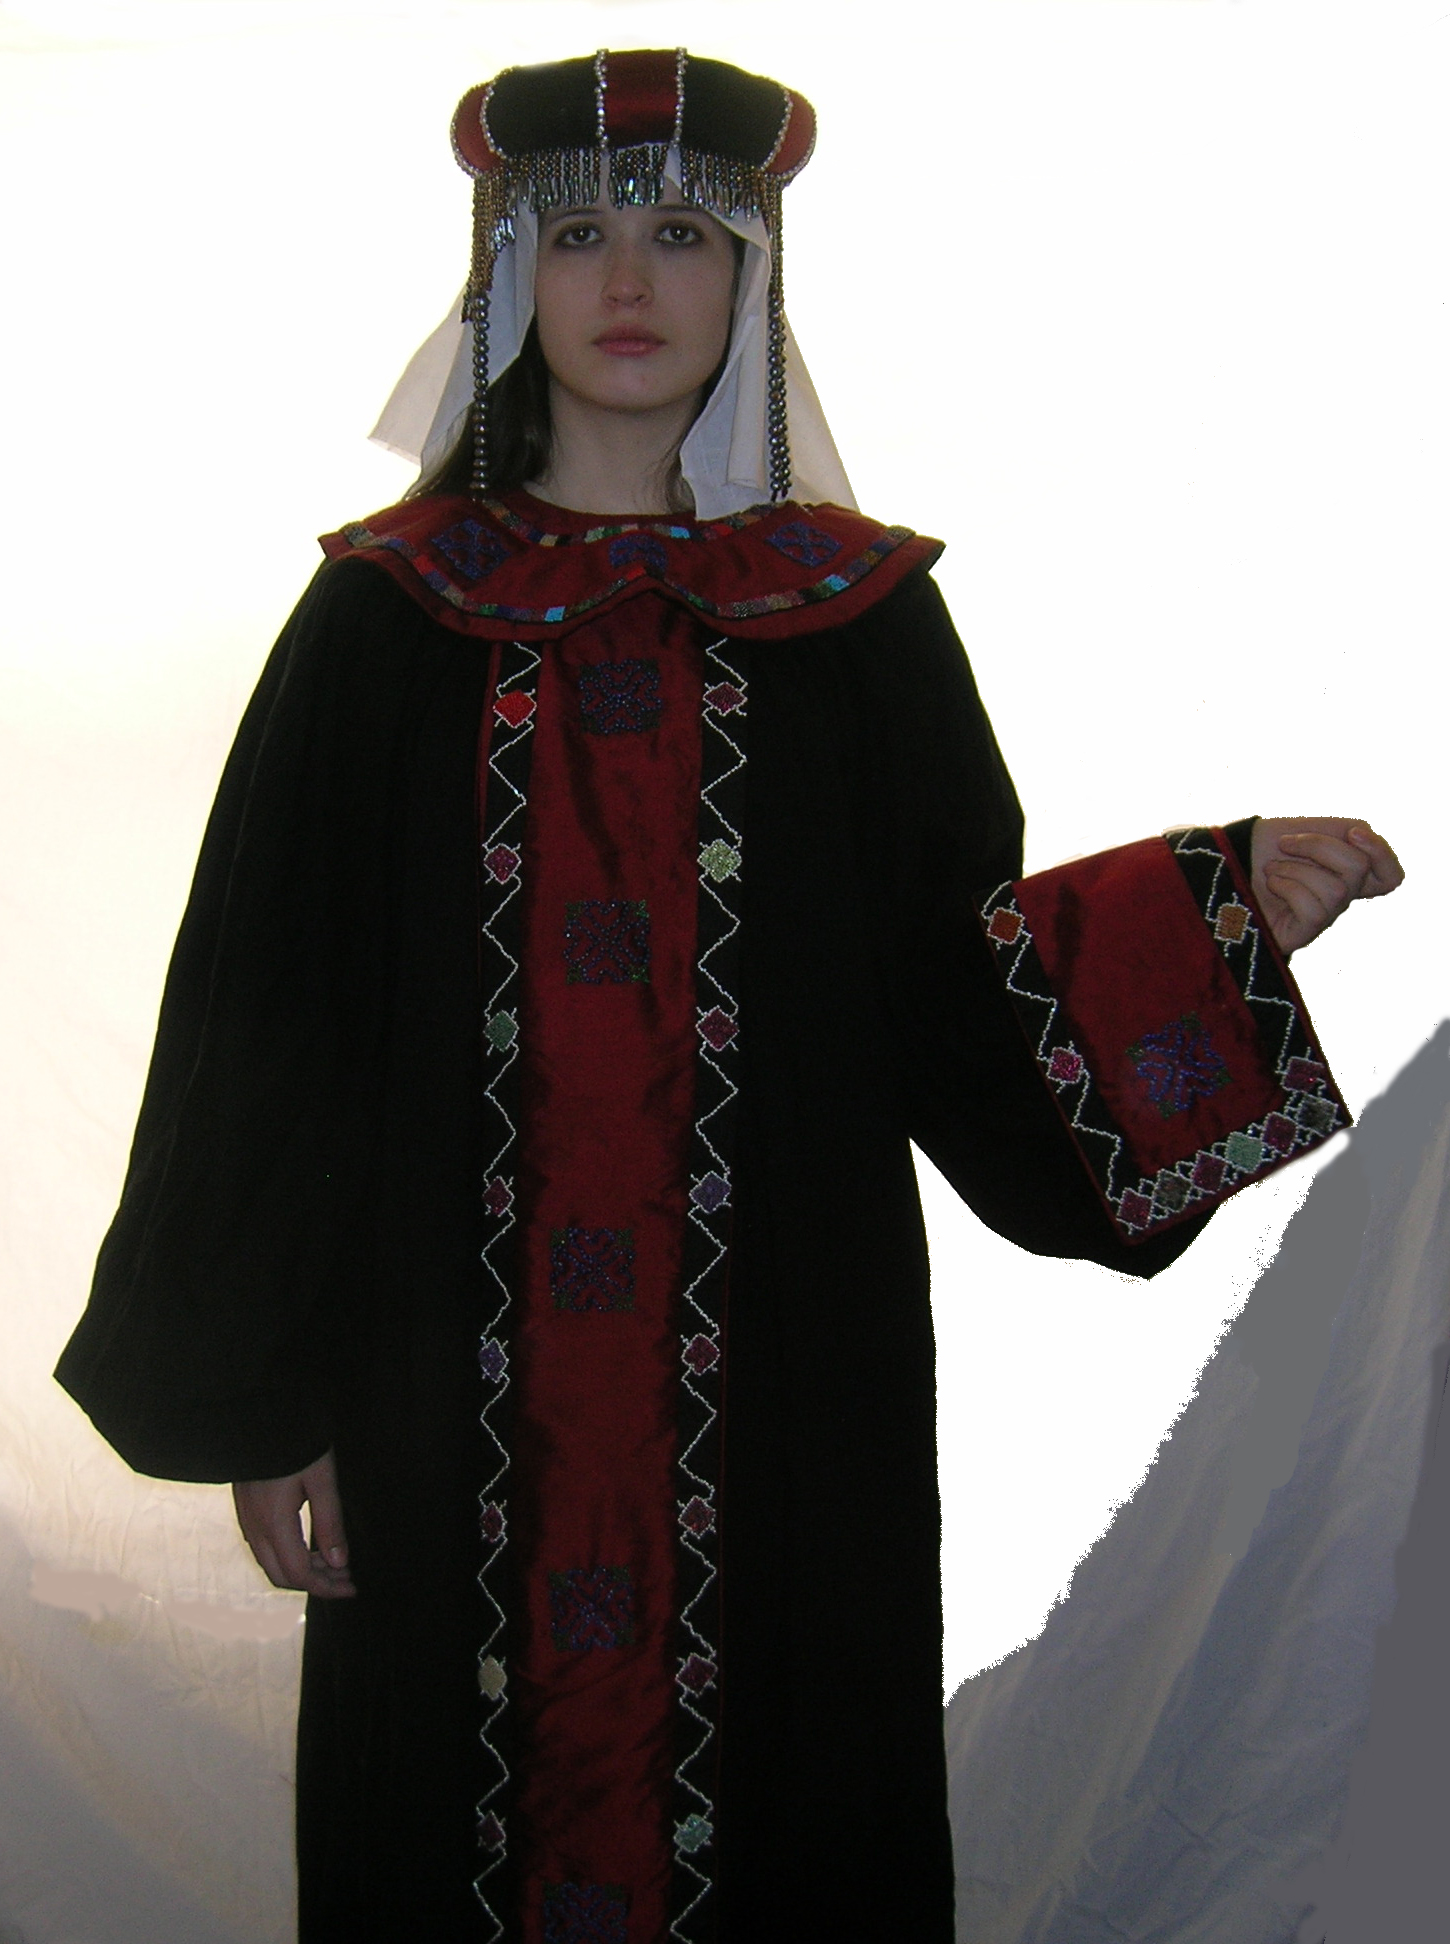
This project was initially conceived as something to use rectangular
pearls. It then grew to its final form of 3 distinct pieces. The first piece was
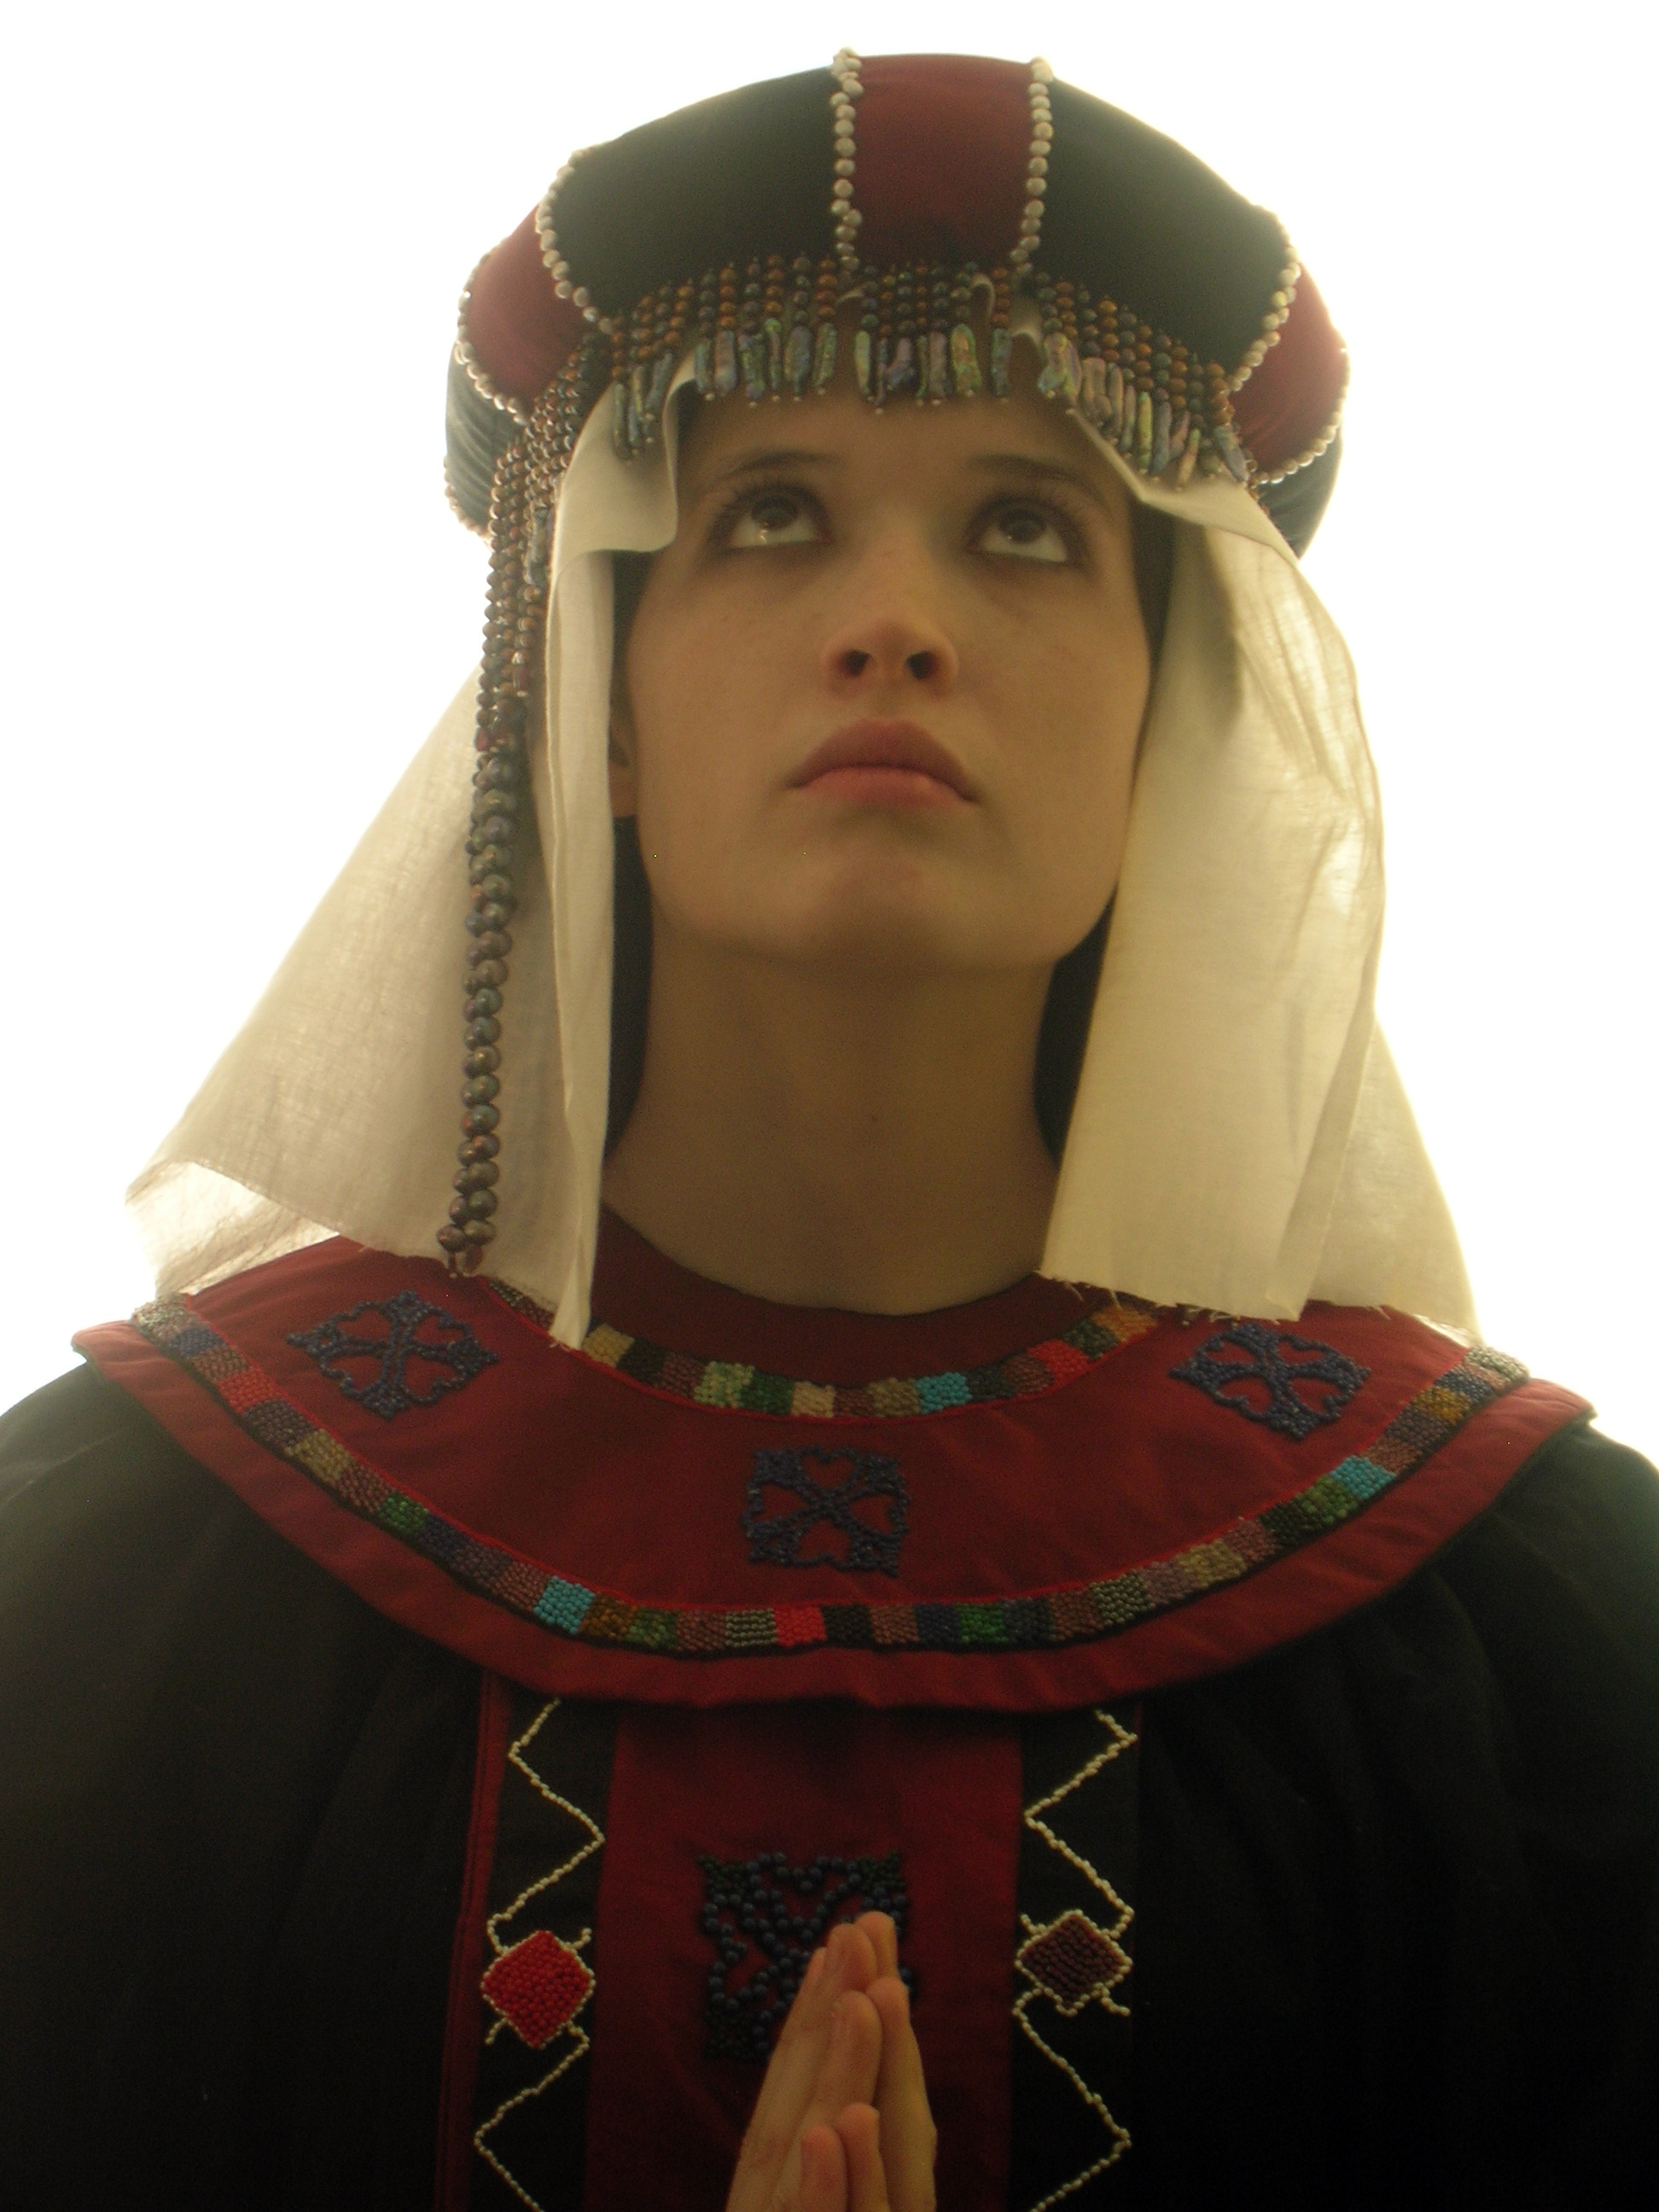
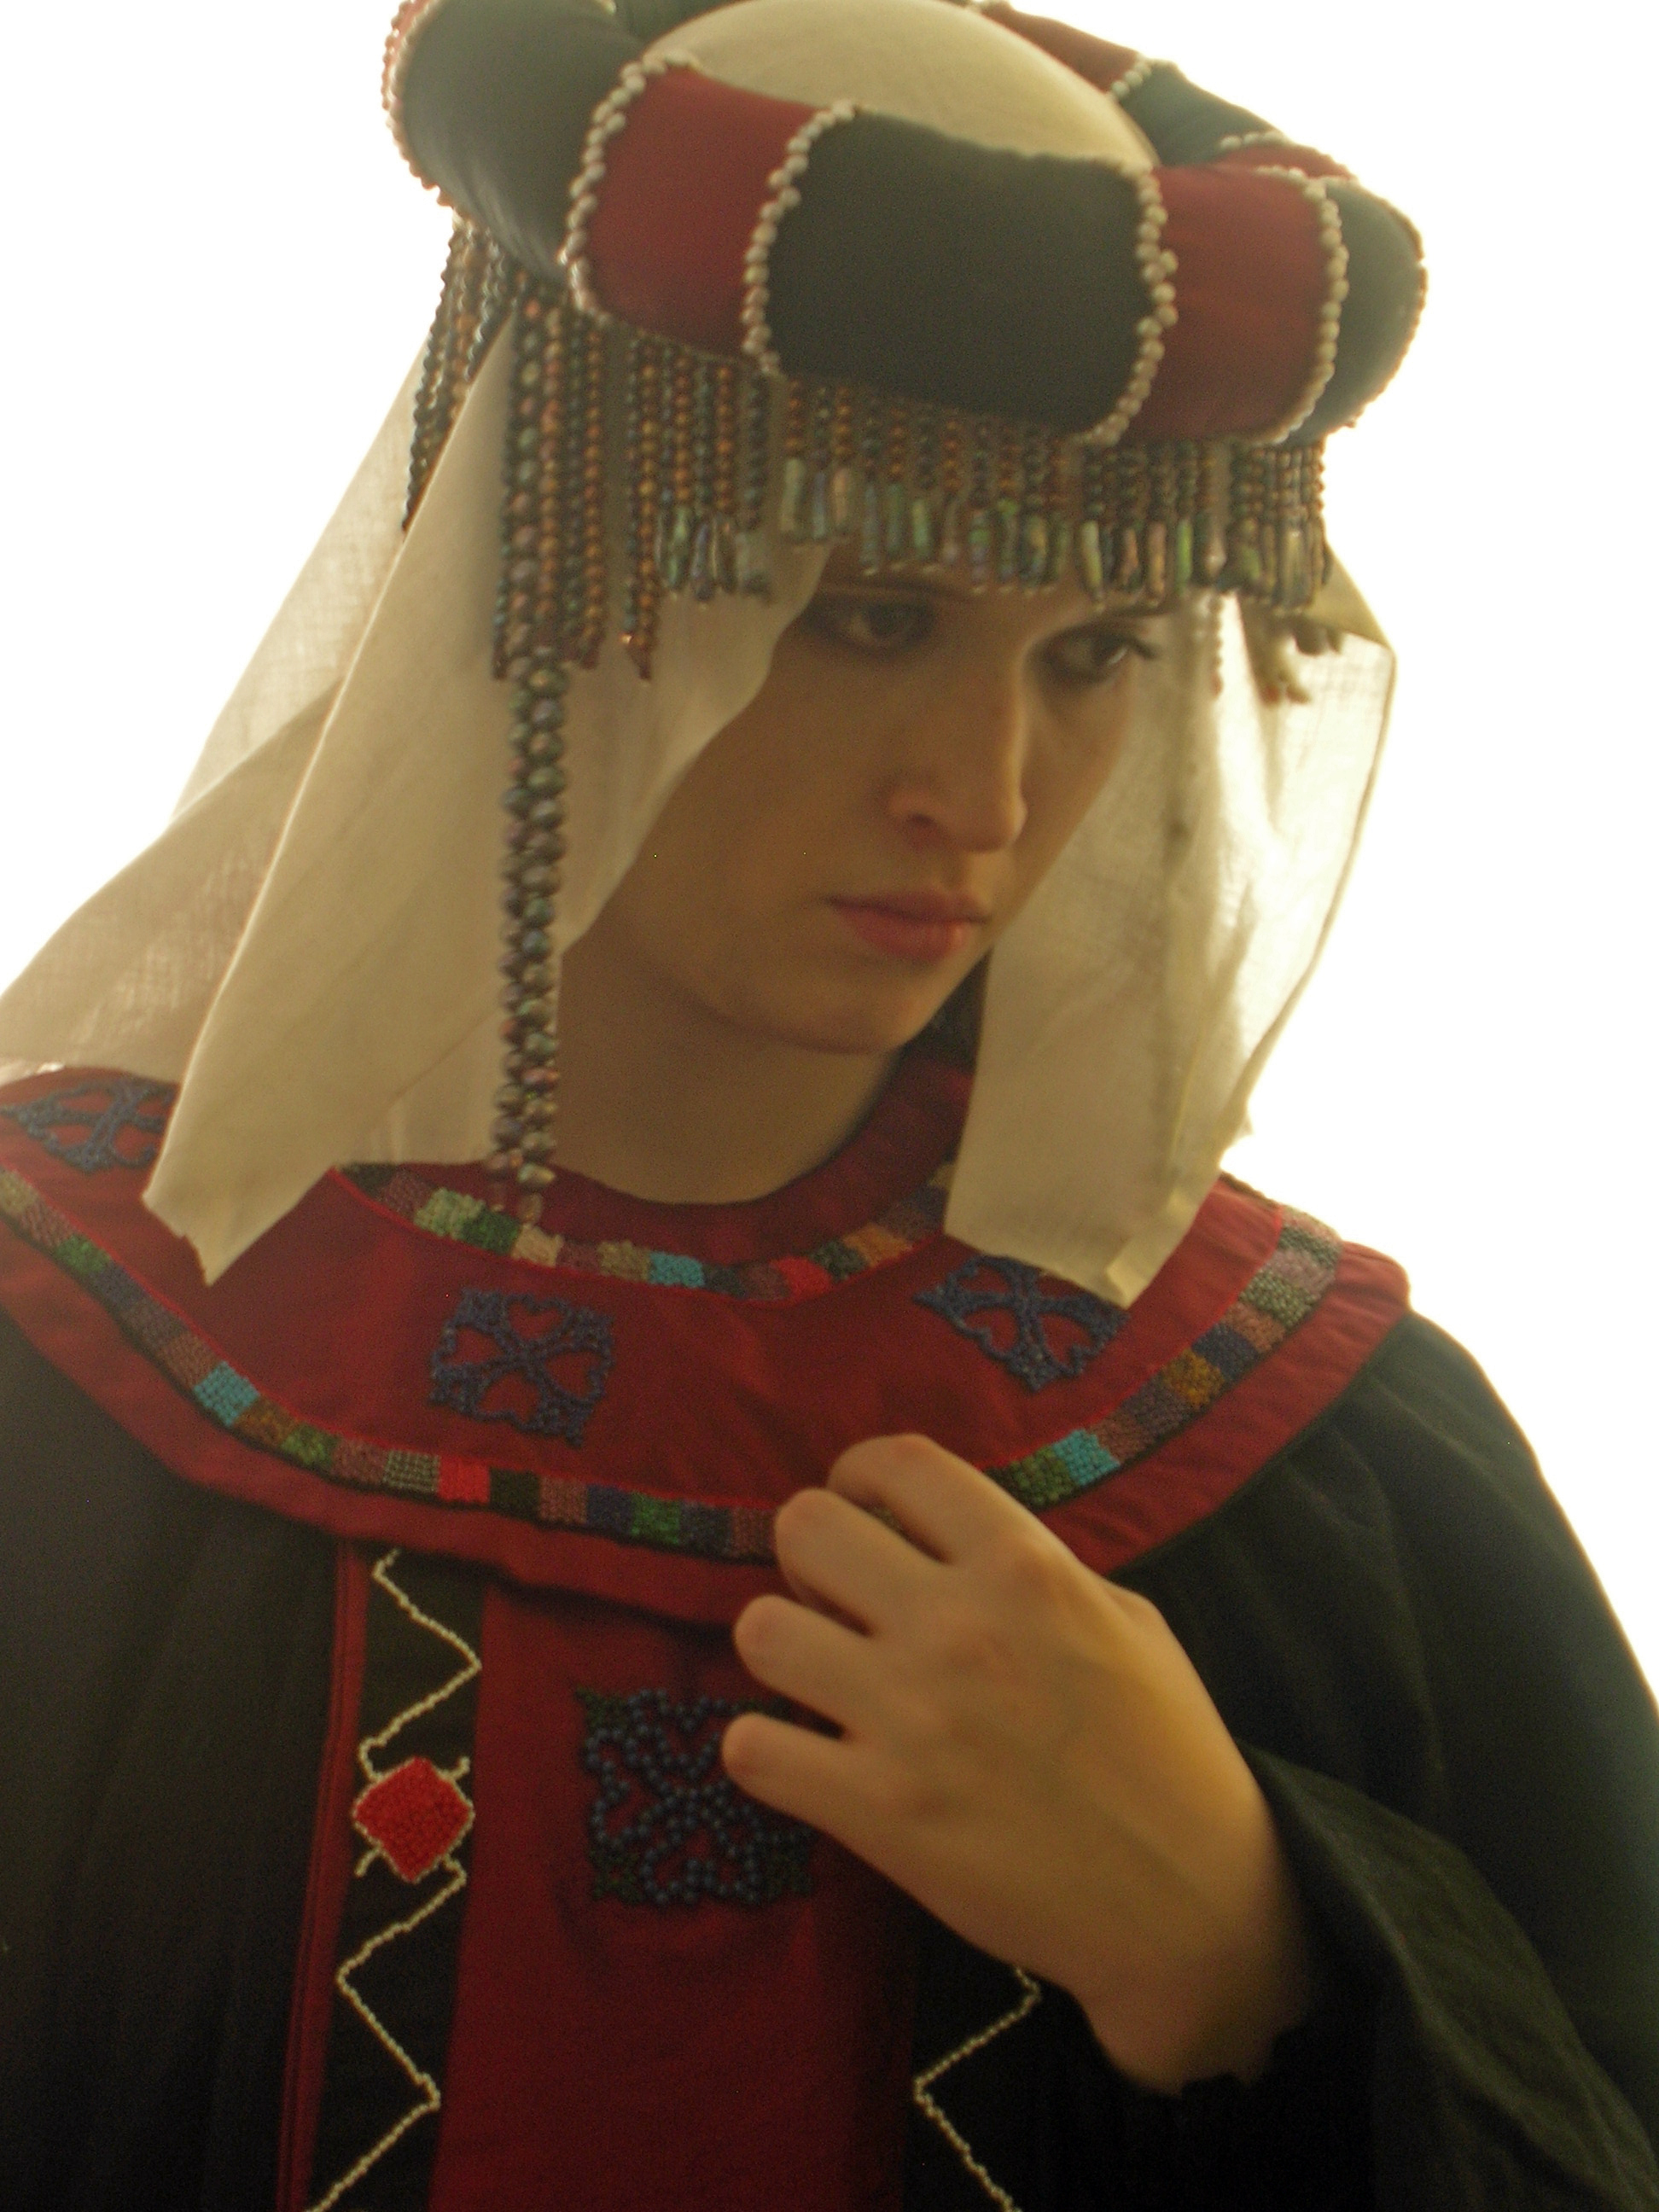
the Headdress, which took 6 months to work up and execute. The Collar (or
Superhumeral) took 2 years, and the Pallium took 4 years. These were my first
beading projects, in which I taught and designed myself. As these pieces are my
own design and conjecture, I have very little in the way of documentation of its
‘correctness’. Herein is mainly an attempt to document my process and
thoughts.
DISCLAIMER: I am not a trained costumer, and this design was not made with any insights into the tailor’s trade. This is a supposition based on assumptions and theories. I do not say that this is a period process, but may induce a period result. Take it as you may.
Construction
All the pieces are made with silk and linen. They were all hand sewn, and
each pearl and bead is individually stitched, using a period thickness of Arabic
cotton thread. The stitching for the cloth uses black linen thread. The trim is hand made, beaded using a scroll loom, then appliquéd. All of
the pearls and stones are real.
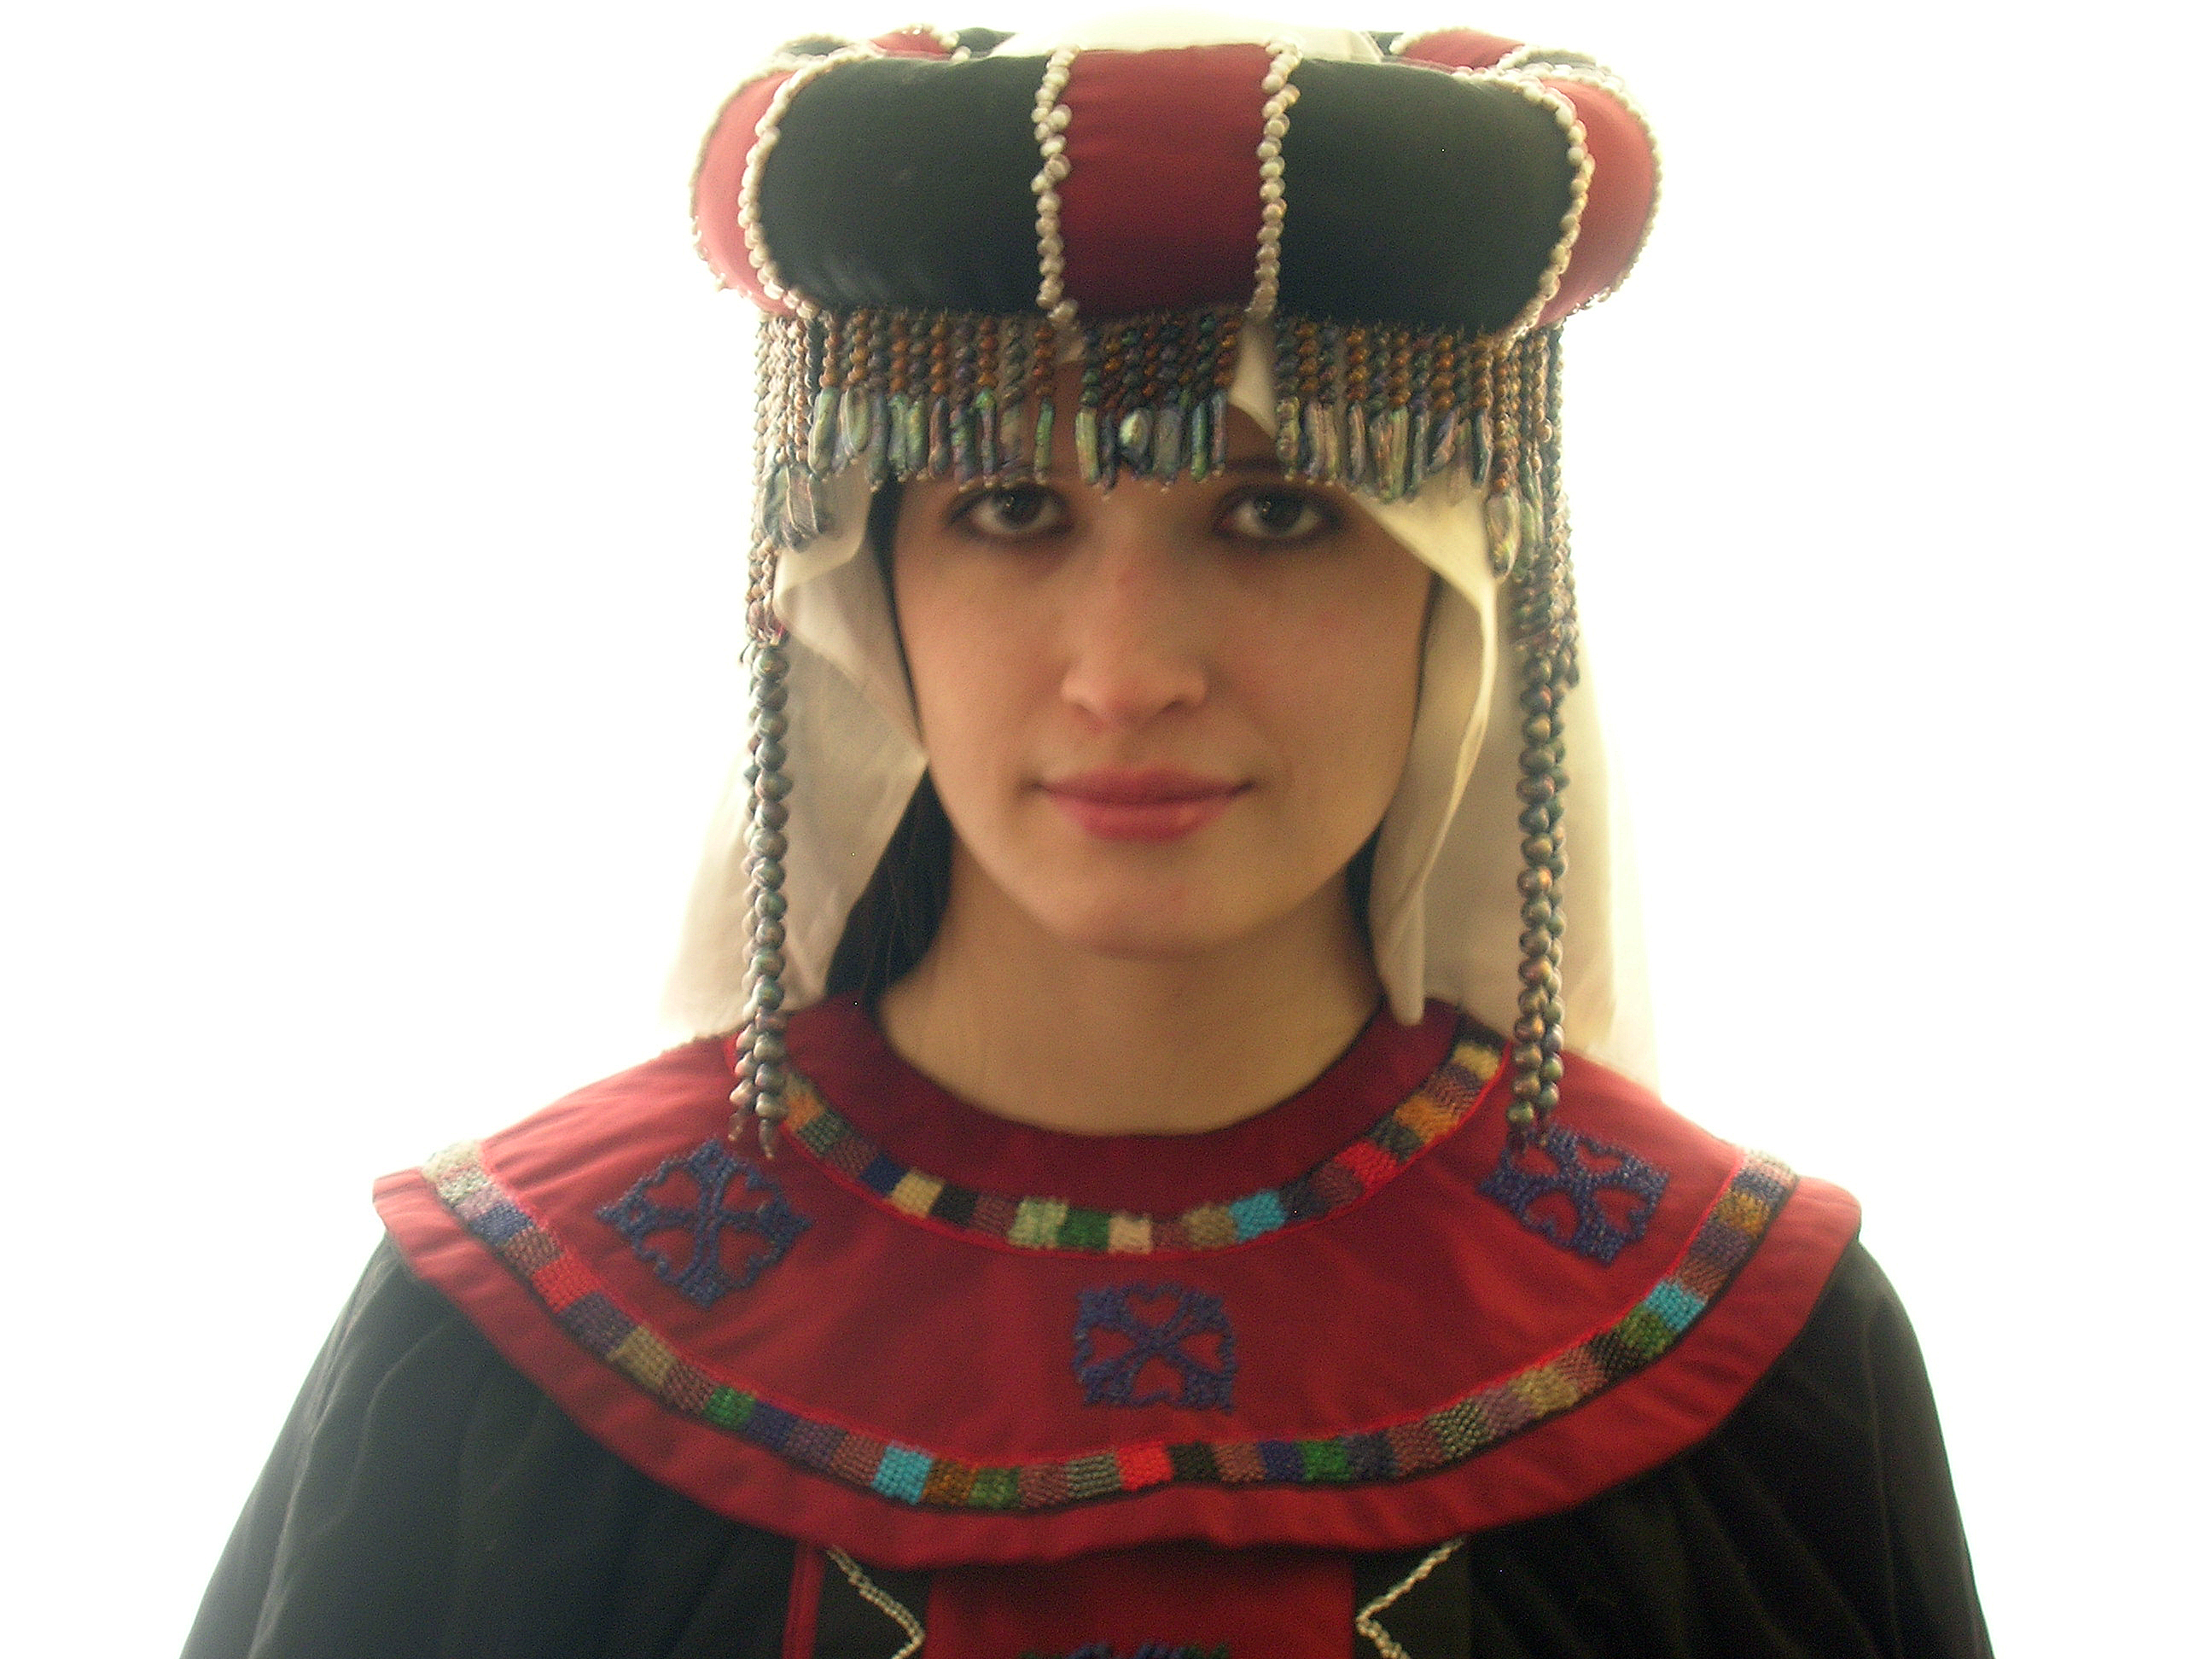
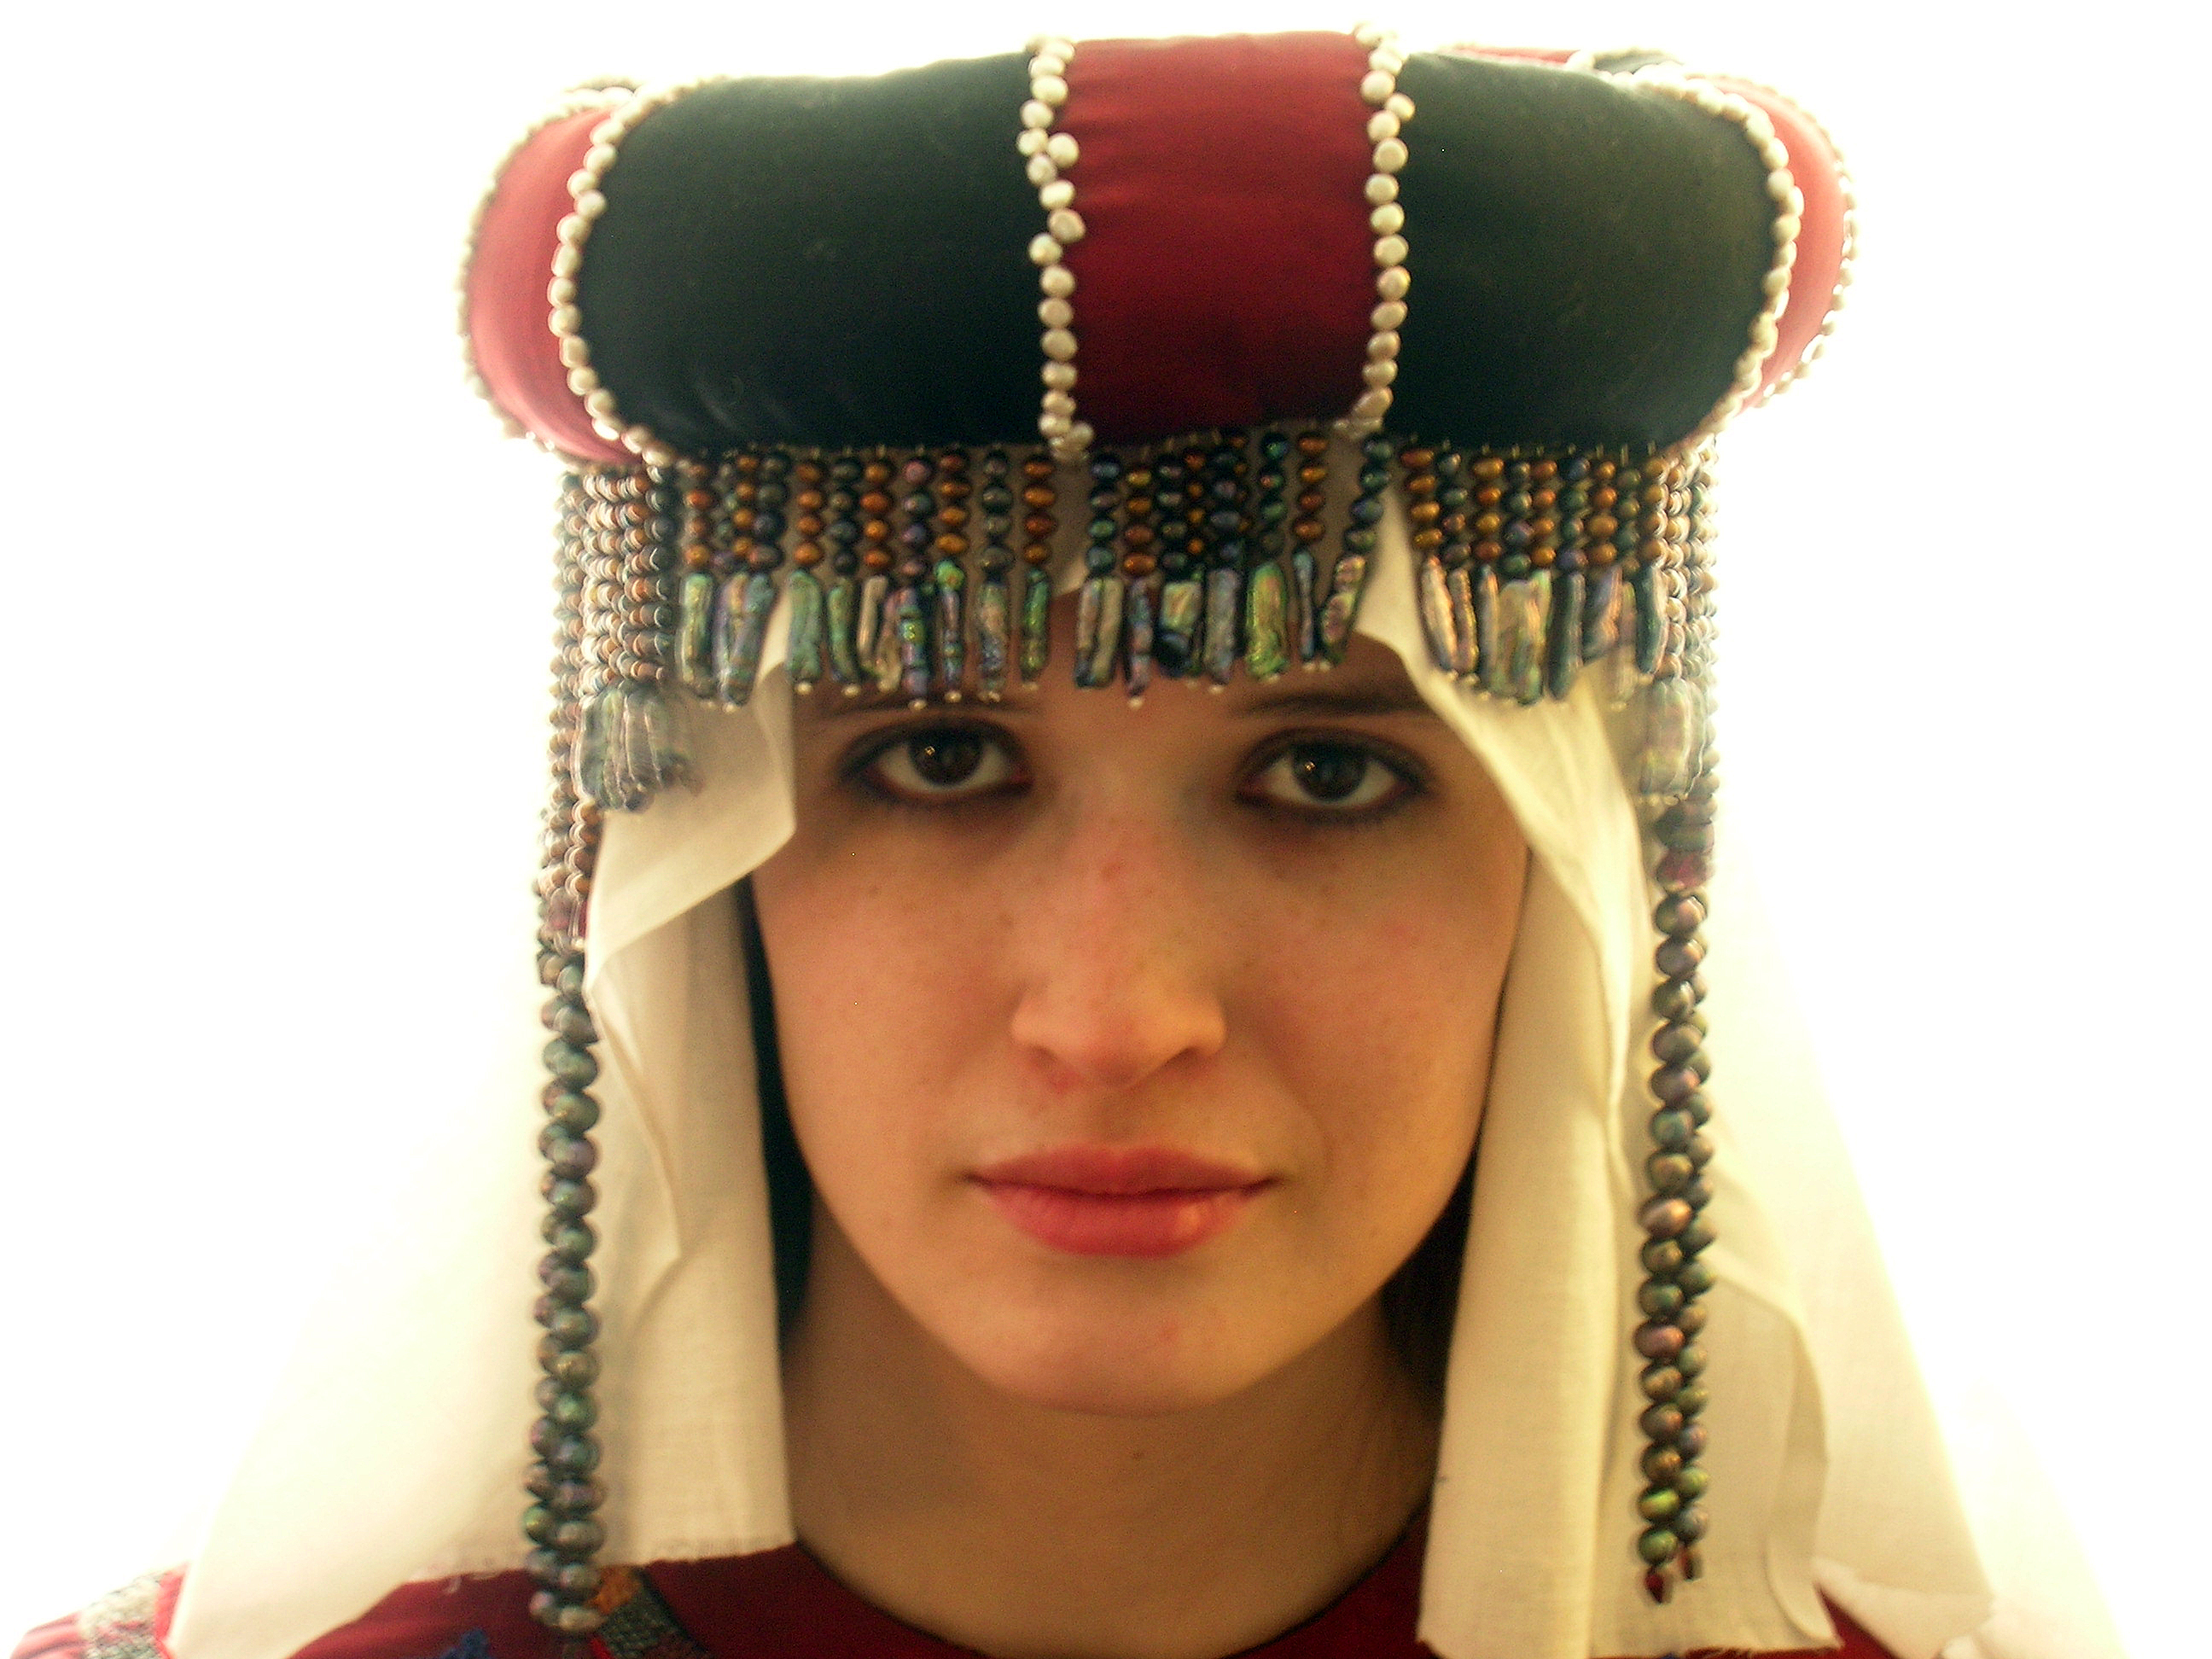
Some stats:
The headroll has 3,000
pearls.
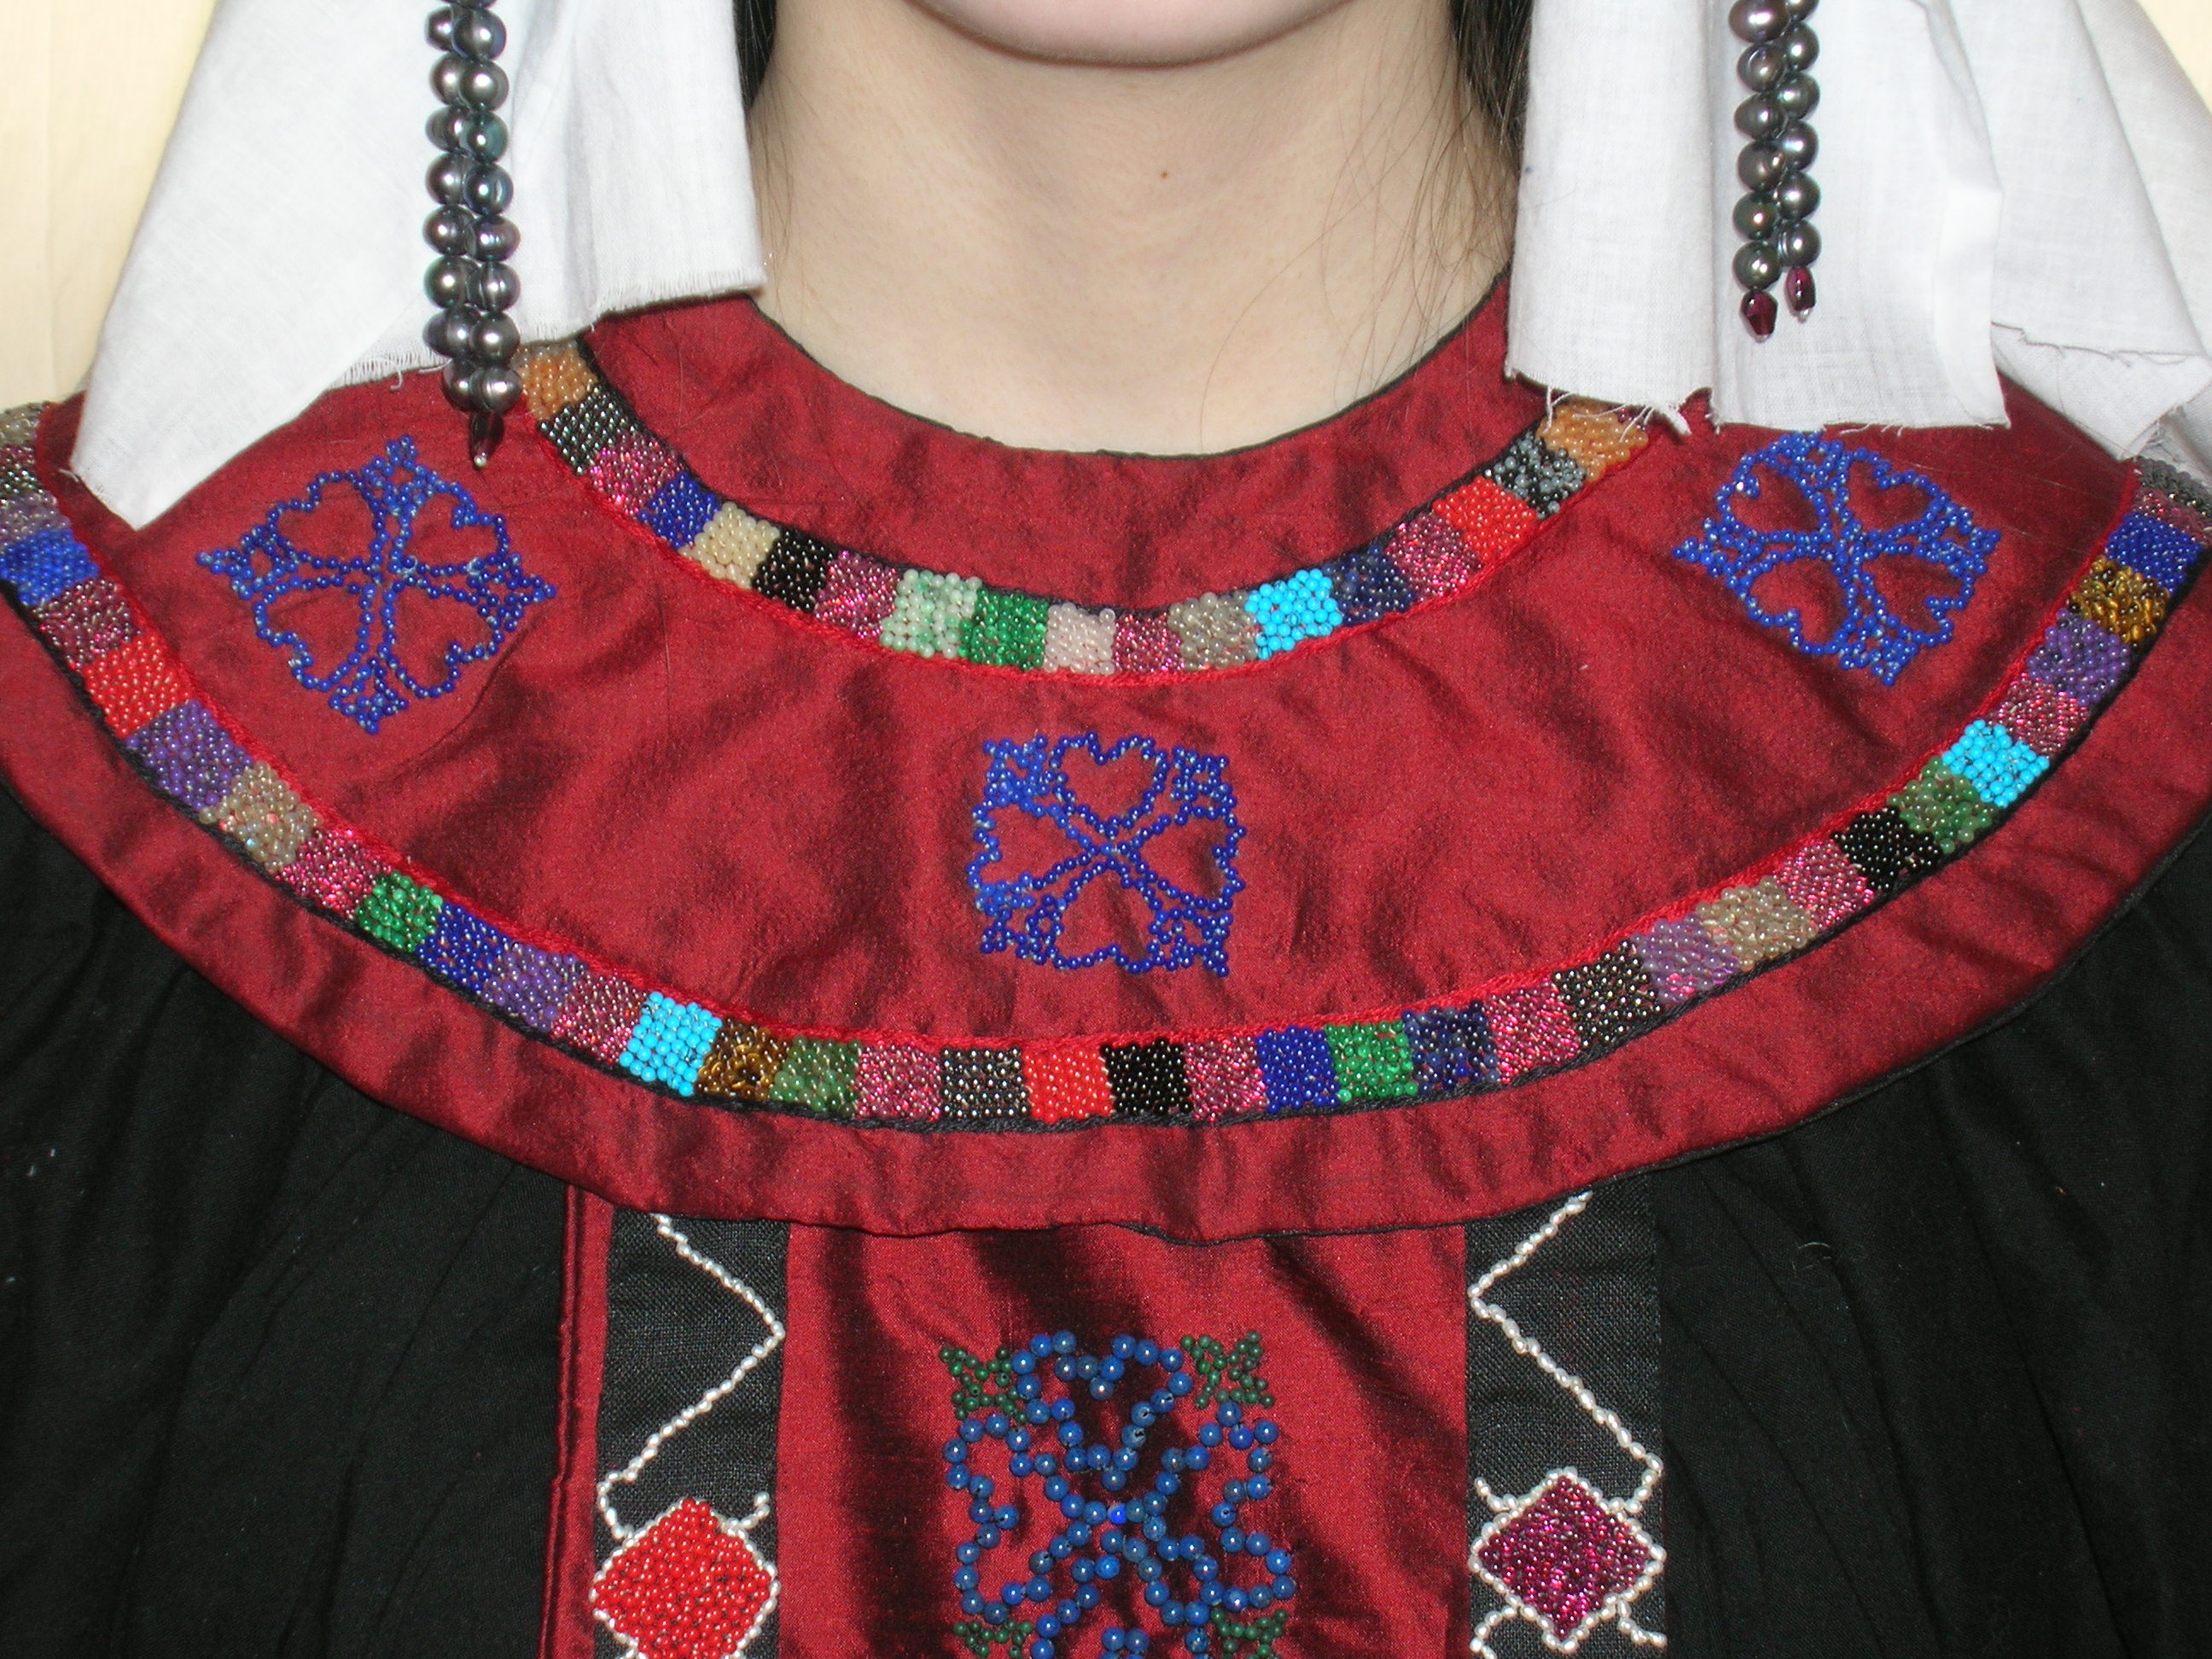
The collar has 4,700 2mm
semi-precious stones.
The pallium has 7,655 pearls and
6,730 2mm semi-precious stones (14,385 in total).
Total: 68 strands of pearls and
62 strands of semi-precious stones (10,655 pearls and 11,430
stones).
Semi-precious stones used in this
project consist of:
Yellow
Jade
Alamandine Garnet
Amethyst
Aventurine
Blue Topaz
Citrine
Coral
Fancy Jasper
Garnet
Hematite
Jade
Jet
Labradorite (Spectrolite)
Lapis Lazuli
Malachite
Moss Agate
Peridot
Purple Jade
Quartz
Rose Quartz
Smoky Quartz
Snowflake Obsidian
Sodalite
Tiger’s Eye
Turquoise
Yellow Aventurine
Yellow Garnet (Hessionite)
All of these
stones are either regional to the Empire or from along established trade routes.
The farther stones are Labradorite from
BACKGROUND: I began a project in which
I was to build a Byzantine Headroll circa 12th Century AD. After
looking at Herbert Norris’ Ancient
European Costume and Fashion for the pretty pictures, I had a basic idea of
what I wanted. I did some more research (always a good thing, I’m told) and
discovered three things about the Byzantine ‘Headroll’:
1)
There are no extant examples. What images we have from period are
mostly mosaic work and statuary.
2)
There is some academic disagreement as to what the ‘headroll’
actually was. Some argue that it was a headroll, others a hat, some a hairstyle,
etc.
3)
In all instances that a headroll was shown, there were bands of a
different color. When those times that the entire headroll could be seen, there
were usually 5 bands of a different color adorning it, 3 visible from the front,
2 in the back.
These are some pictures that helped me come up with my initial theories and designs:

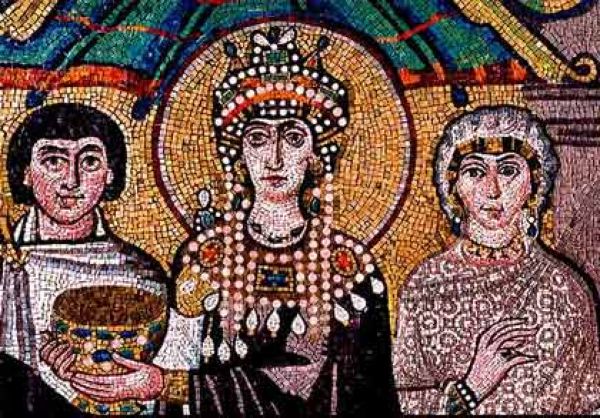
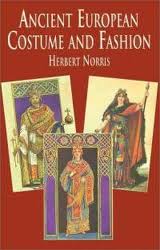
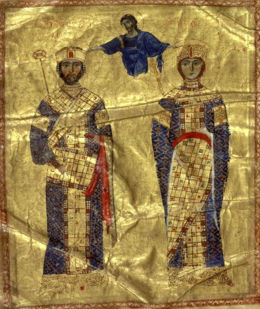
From: Dover (Historic Costume plate 87); Ravenna Mosaic (6th cent); Herbert Norris, various (book cover shown); & an icon of Nicephorus III and Maria of Alania (12th cent).
HOW TO MAKE A BYZANTINE HEADROLL
(A NON-COSTUMER’S PERSPECTIVE)
THEORY: With the above learned, I made
the decision to design my own headroll (my idea not being any more or less
likely to be right in this instance). Having started this project with the idea
of making a headroll, I saw no reason to deviate from this.
I started with the idea to try to build
a headroll with as little wastage as possible; having some inkling as to the
expense and trouble it takes to weave cloth. I reasoned that the easiest way to
make a headroll with no wastage was out of a tube. After building a tube of
cloth and stuffing it with wool, I bent it into a circle and whip stitched the
ends together. The result was a very wrinkly oval.
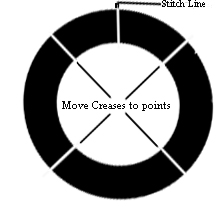
I surmised at that point reason for the
5 bands: If one covered the seam with one, and then moved all the deep creases
into 4 symmetrical points and covered them, you would arrive at 5 bands, a nice
looking headroll, and no wastage of cloth.
DESIGN: What you will need: 2 colors of
pre-shrunk cloth (less than a ½ yard here, so splurge); Wool or Polyfil; a
pencil, dowel or chopstick; and needle and thread (a sewing machine will only
work for the first seam).
Firstly, decide on what size of
headroll you want. For most people, I would recommend about a 2” diameter. You
can make your own choice by rolling up some fabric and (by use of a mirror) find
a size that you like.
Now, measure the diameter. You get
the circumference you need by the formula C=Pi(3.14)*D. Round off to the nearest
half-inch and add in an inch or two for seam allowance. [Note: Remember your seam allowance! If you
don’t you headroll will be too small. If you forget how much you added, it’ll be
too large.] That gives you the width of your material.
To get the length, measure the
circumference of the head in question. Now apply this formula: C+2D+SA=L. Or,
the head Circumference + twice the headroll Diameter + Seam Allowance = Length.
For example, if you go with the 3” headroll and the measured head is 22” you
get: 22+(2*3)+2(seam allowance)=30”.
With your previous Circumference
measurement (3.14*3)+2=11.42. Round to 11.5. Taking these two measurements, cut
a rectangle.
Remembering your seam allowance,
sew the long edges together, forming a tube. Turn the tube inside out, so the
seam is on the inside of the tube.
Now, taking your filling material
(if you use wool, you’ll need about a pound) stuff the tube using the dowel to
ram and tamp it. The fill material will partially collapse over time and use, so
make sure you pack it well. When almost completely filled, bring the ends to
meet around your head for an accurate fit. Fill it to the desired level, and
then stuff the ends inside. You will want to slightly ‘overstuff’ as the filling
material will collapse over time.
Whipstitch the ends together,
closing the tube.
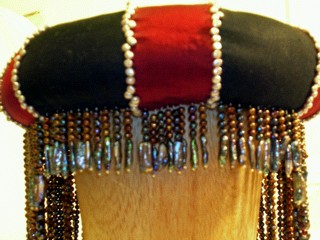
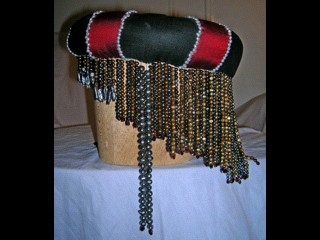
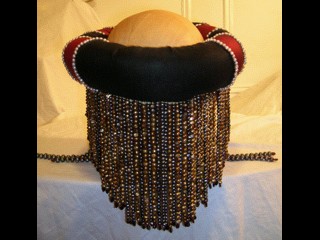
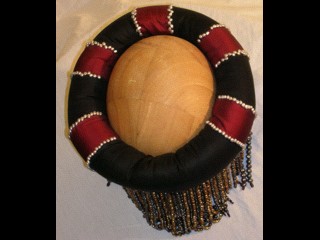
Now, the tube will be badly creased and wrinkled. On the inside of the circle, this is to be expected. If there is wrinkling on the outside, you did not use enough filling. By hand, move the creases to 4 points opposite each other. Making the seam the top of the circle, picture an X crossing it, and move the creases to those points. Set the roll aside.
Take your other cloth, and measure 3” by C+1
and cut 5 rectangles. Fold in ½” on all sides of the length and width. Make sure
that the bands wrap completely around the roll.
After ironing to crease the cloth (optional) stitch the bands over the seam and creases making the ends meet on the inside. If you are one that can make nice seams, you’re done. If (like me) you’re not, you can cover your seams with pearls or beads. Enjoy!
SUPERHUMERAL (LOROS)
The Superhumeral or collar (possibly freestanding) was the second
project, and is in some respects the least period. In looking at the same
imagery and mosaic work that I found for the Headroll, I noticed that the
collars were often depicted with large stones or beadwork. If the size and
proportion was to be taken seriously of some of these adornments, I quickly came
to the conclusion that there would be no way that I could afford this project. I
also decided to make the collar freestanding, for ease of care and
cleaning.
After trying several different sizes of beads, I went with the 2mm. The
reason for which is that even though they could not in period create stones of
such size, they could imitate larger stones if grouped properly at a distance. I
embroidered silk thread in a split stitch to delineate my beaded area. I started
working on several methods on the collar (right shoulder blade), and eventually
stumbled upon a method that gave me the desired effect. After some
soul-searching, I decided to leave my earlier attempts in place, to note my
progress.
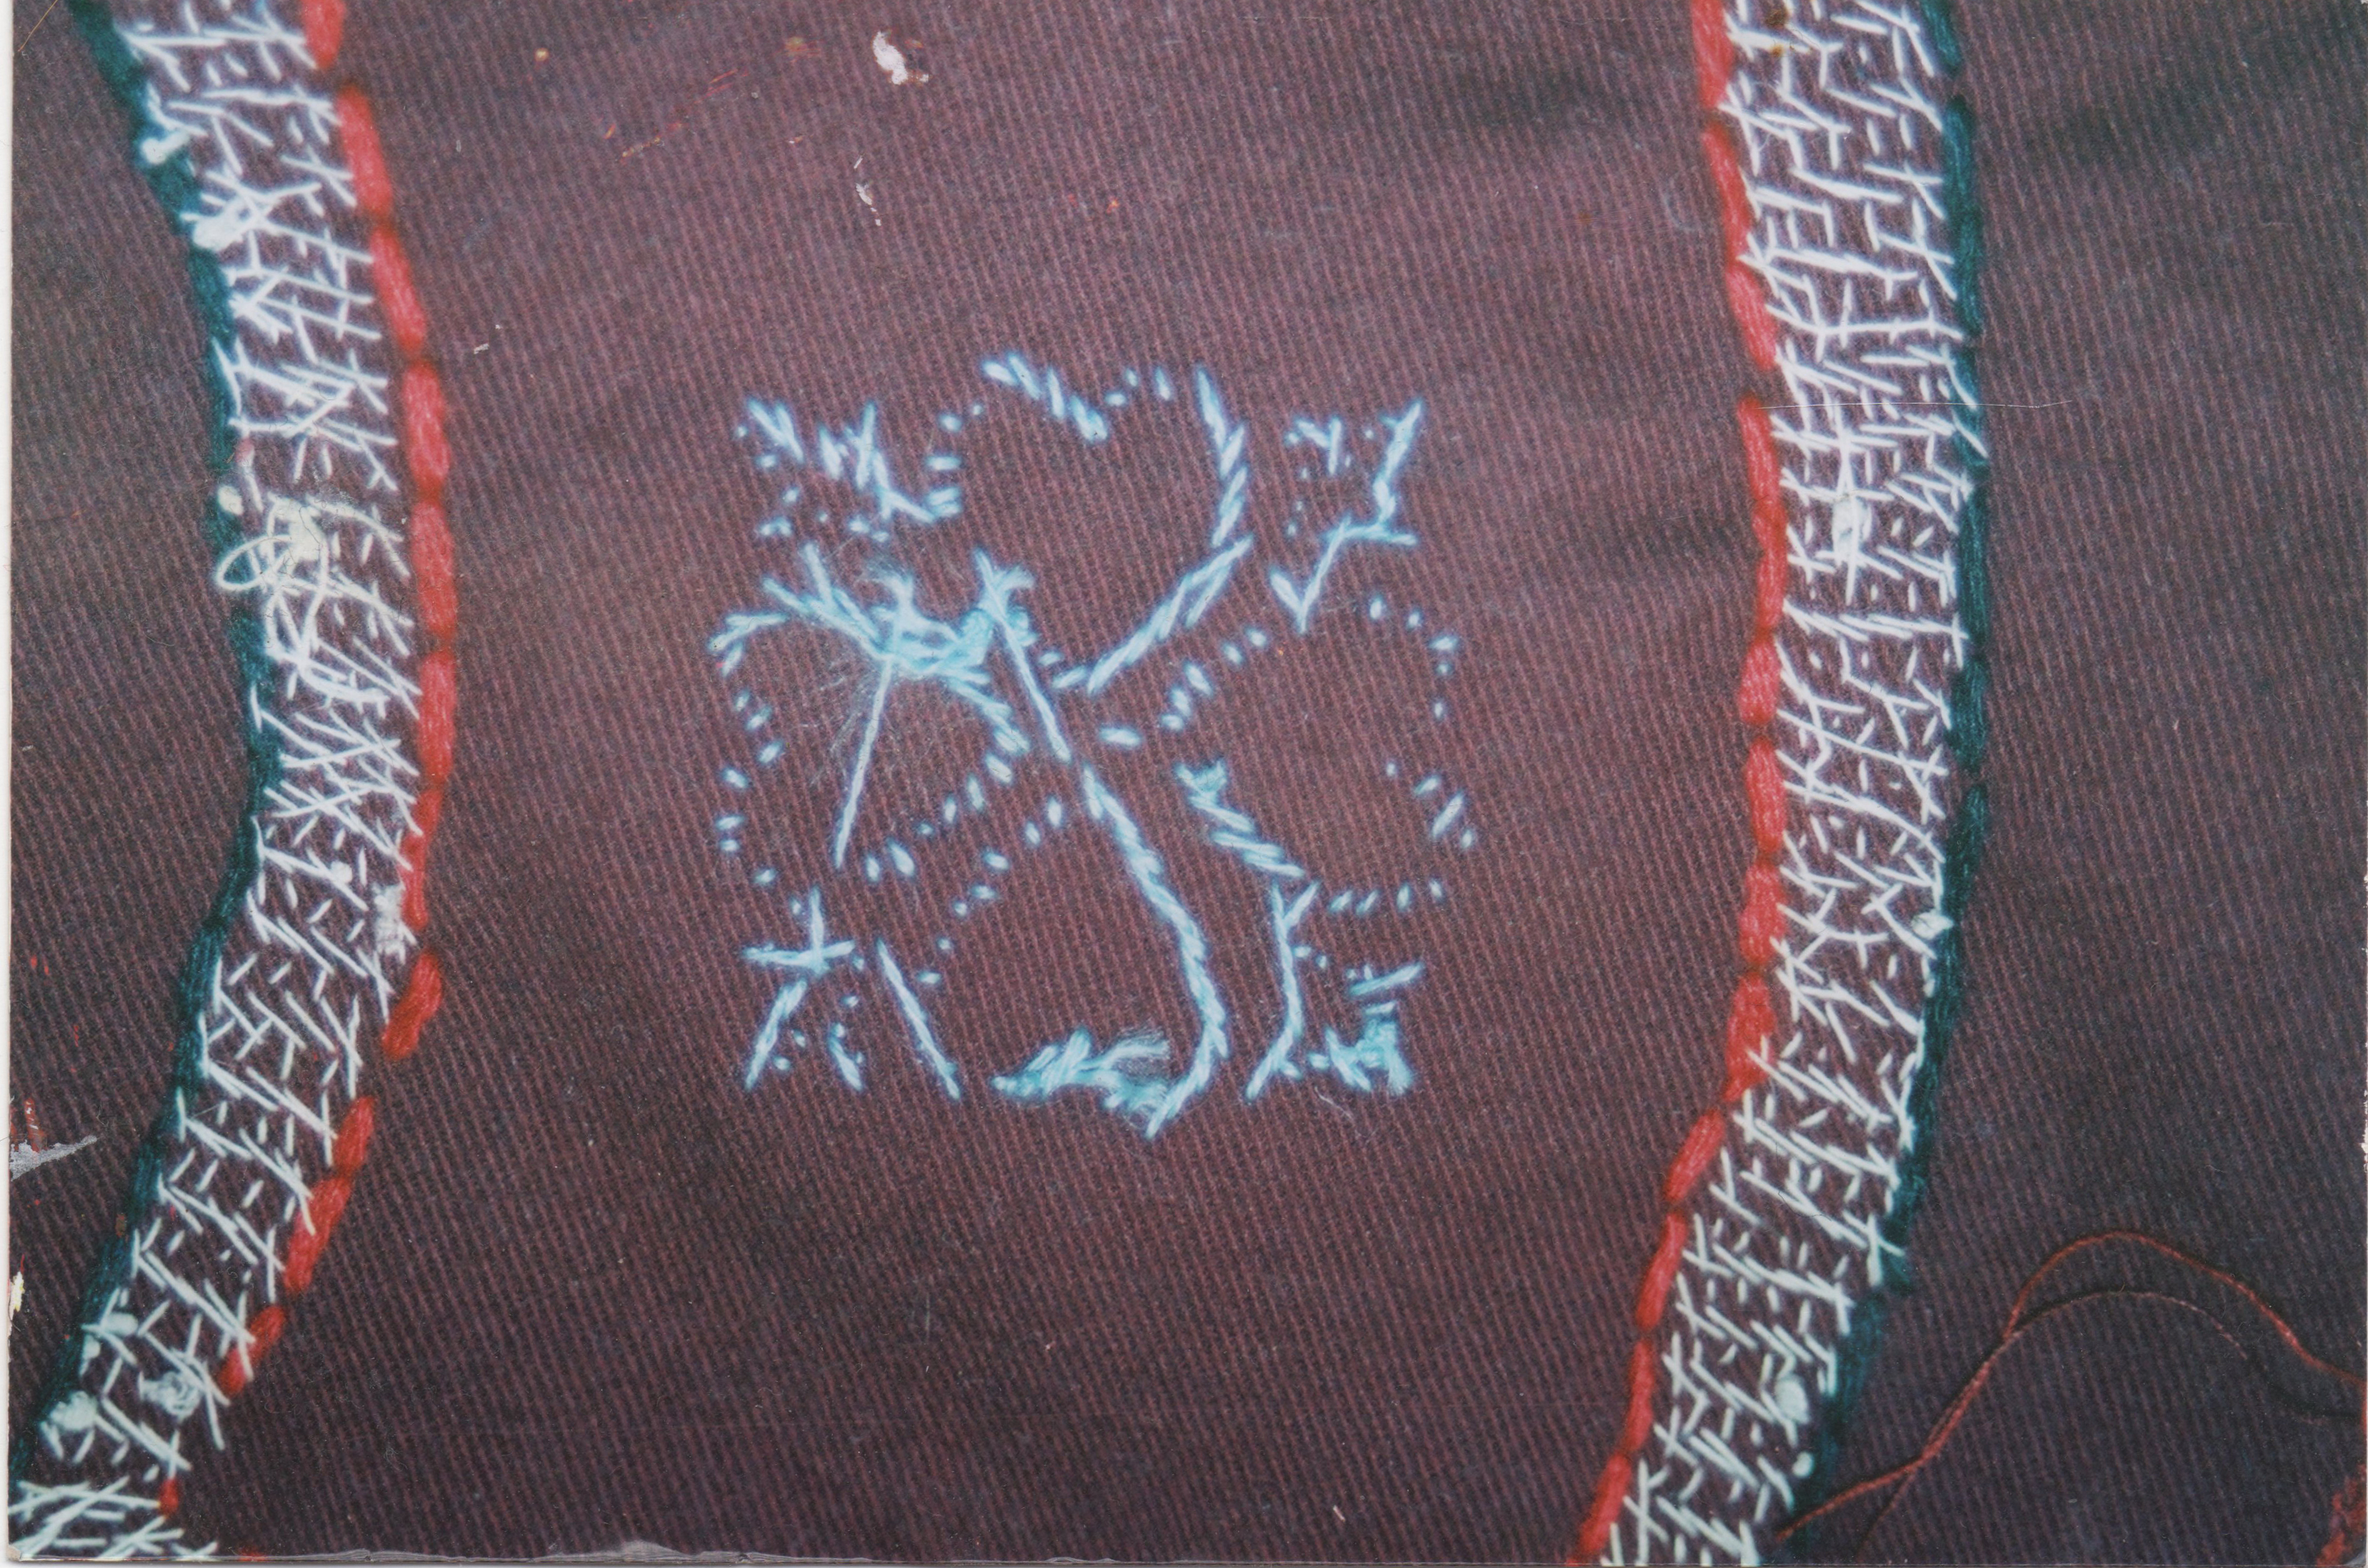
The most difficult, tedious part of this (and the pallium) is that in
most instances the apertures of the beads were too small to allow the thread and
the needle to pass through together. So, I was forced to: 1) Stitch 2) Remove
needle 3) Thread bead 4) Reattach needle 5) Stitch. Rinse & repeat. My
sanity was saved largely due to my purchase and continued use of Big-eye
Needles. It took me approximately an hour to do each half-inch
square.
The collar itself is silk, with an interior layer of canvas for stability.
The center design is the Byzantine Rose motif, chosen mainly due to the fact that the woman that this was being made for has blue roses in her device.
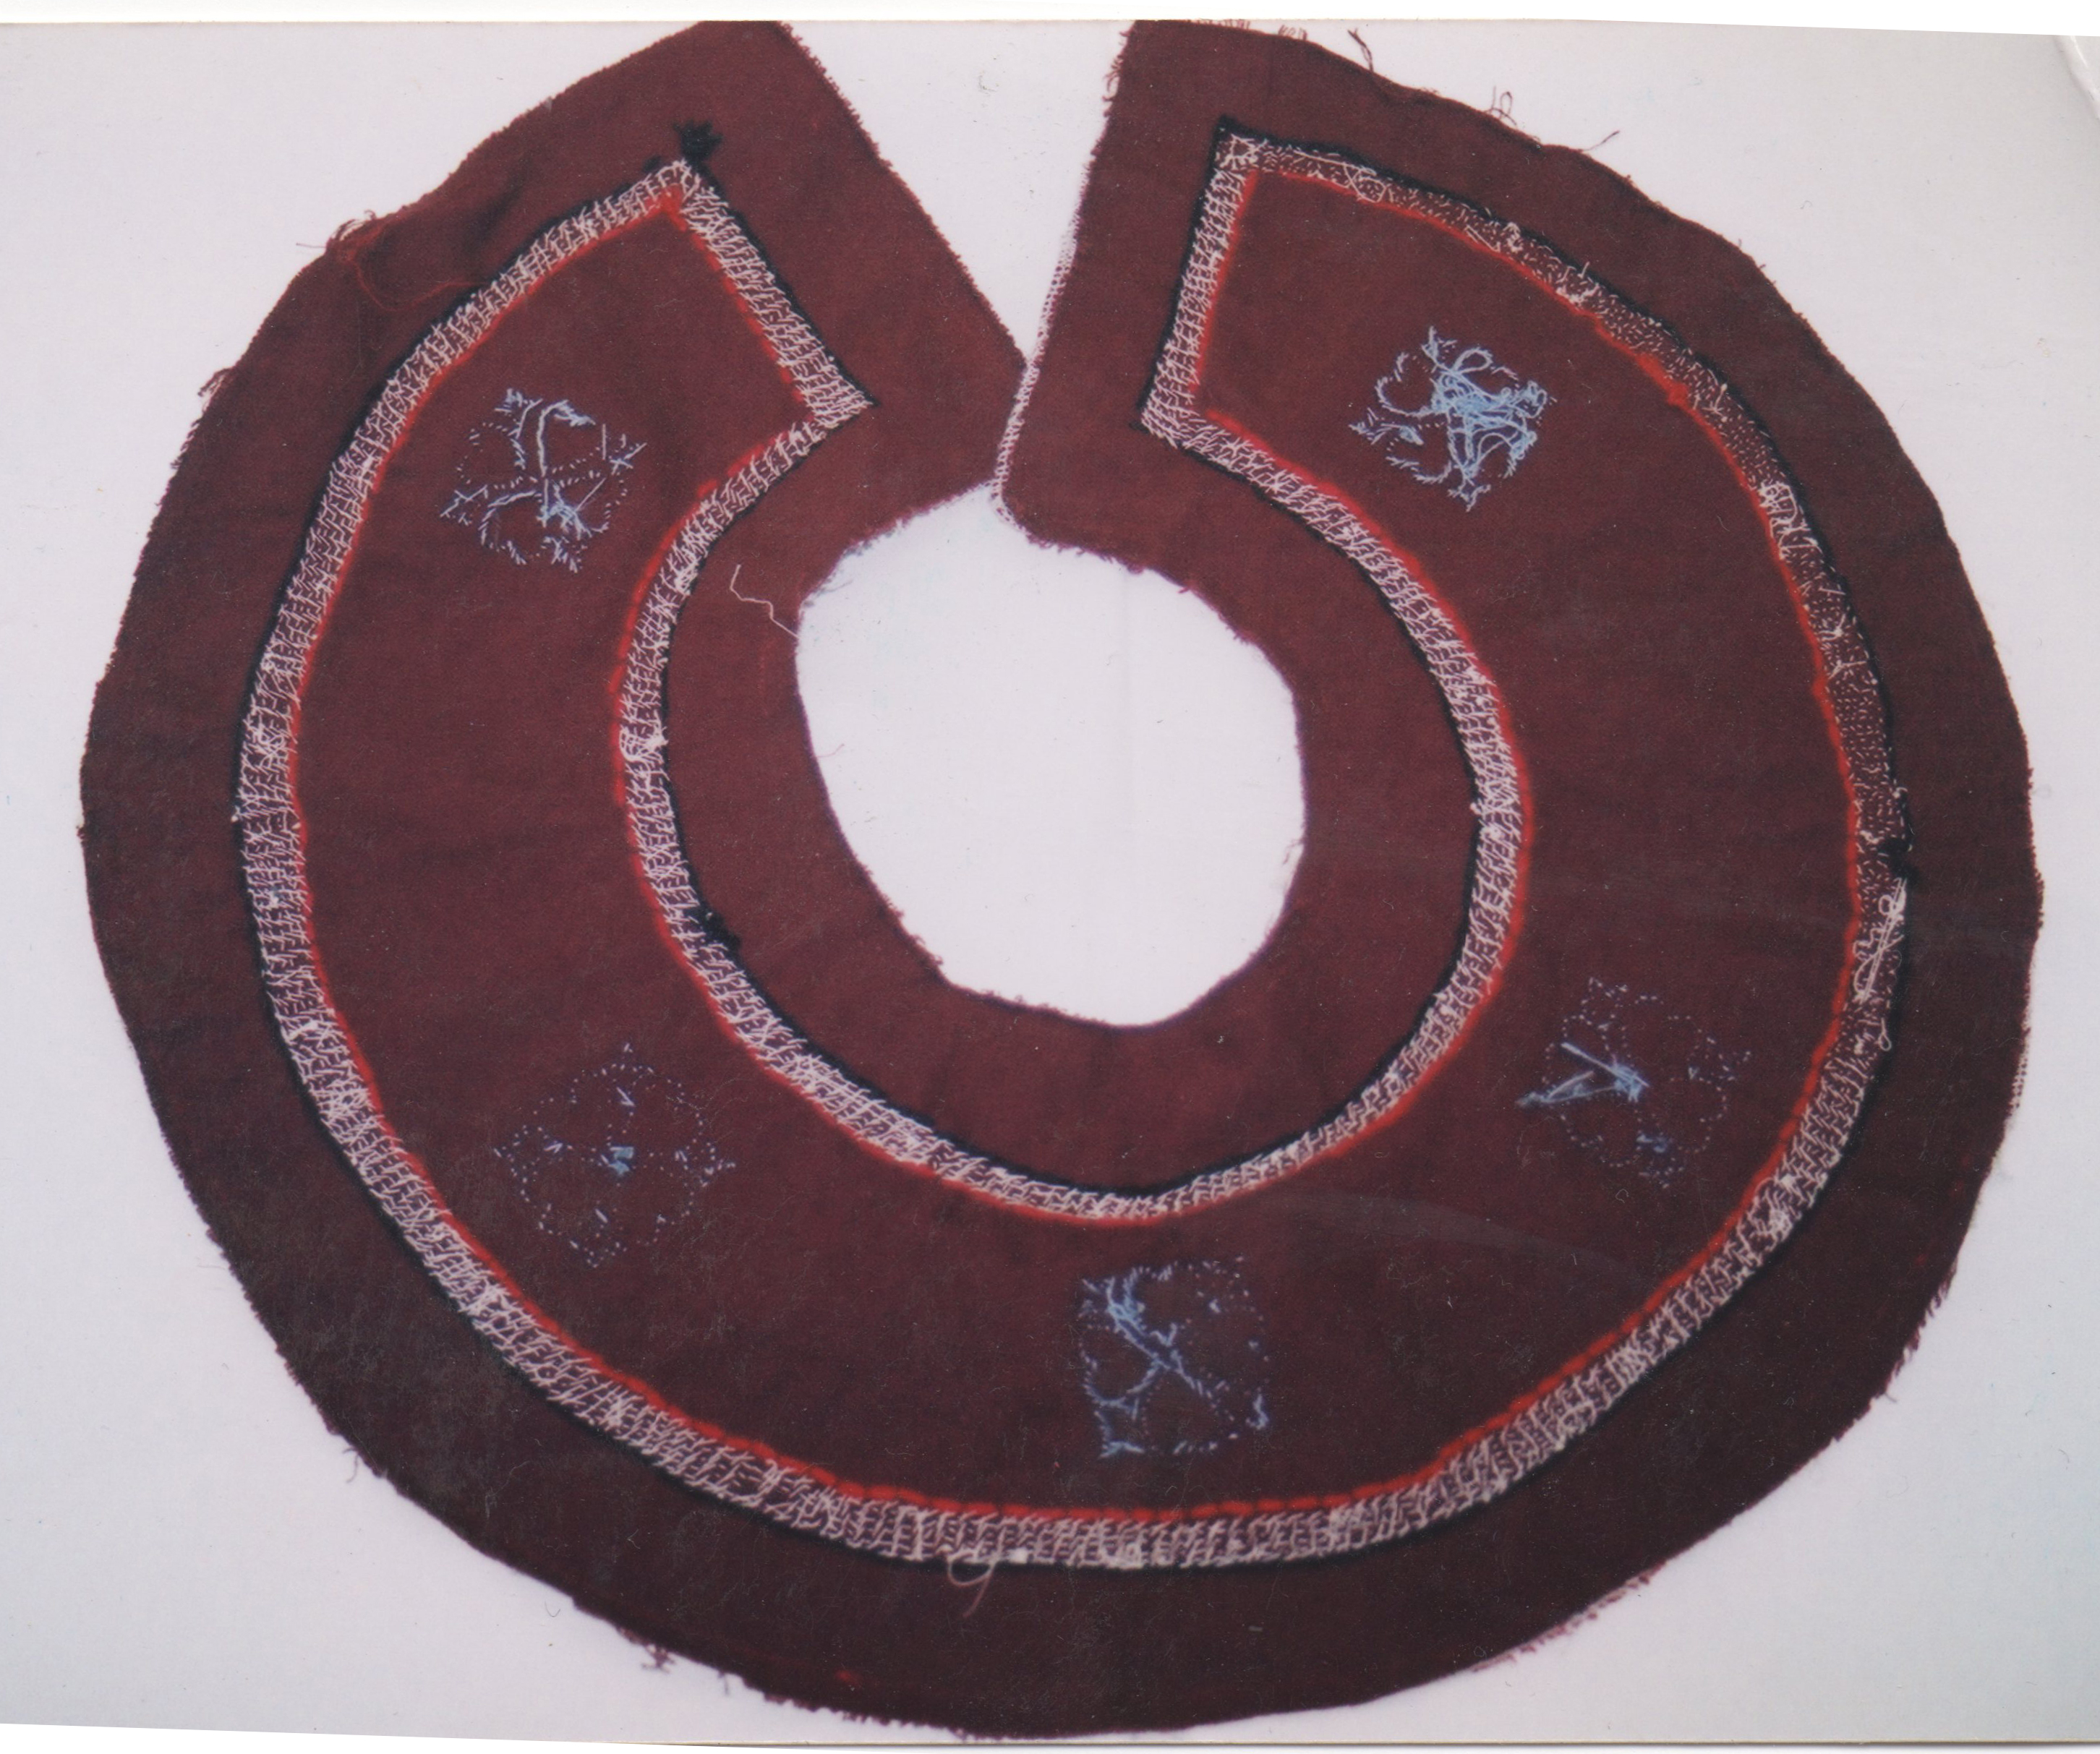
Underside of the Superhumeral: before the backing is applied. Underside of Superhumeral: showing the detail of the Rose and bead stitching.
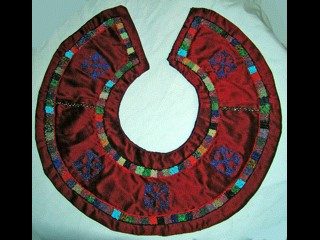
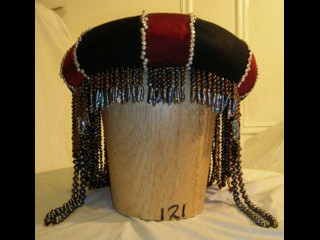
Completed Collar.
PALLIUM
The Pallium is the cultural remnant, or remains of the toga. Worn by the
nobility, it hearkened back to their Roman roots. Over the years, it became
smaller and thinner. It finally became solely a liturgical vestment, as can
still be seen today. It was worn with the back draped over the arm, so the back
(which seemed to be equally adorned as the front) can be displayed and not
damaged by being sat on. I do believe that the back was equally adorned, and not
just an artist’s embellishment due to the constant pulling and adjustment
problems that would have occurred if the weight was not even.
Again, with no extant examples, I wondered how the pallium was
constructed. There again I met divergent opinions in the academic field, which
could not give a consensus as to its construction or in fact whether or not the
pallium was even separate from the superhumeral or tunica. Extant iconography
was of little help, since it showed many different styles over the
years.
To save myself a migraine, I quickly abandoned the idea of having the
pallium attached to the superhumeral. It is simply easier to make them separate.
I decided on the simple idea of straps connecting the two pieces, which would be
hidden by the superhumeral, and give the overall desired effect.
I cut strips of linen out and folded them over to make the trim, and then
set to the beadwork. I decided on a simple design (after discarding ones that
were beyond my ability), and kept the repeating garnet and byzantine rose motifs
from the collar. The trim once finished, was appliquéd to the body, an interior
lining was added to stability and weight, the straps added and the back sewn on.
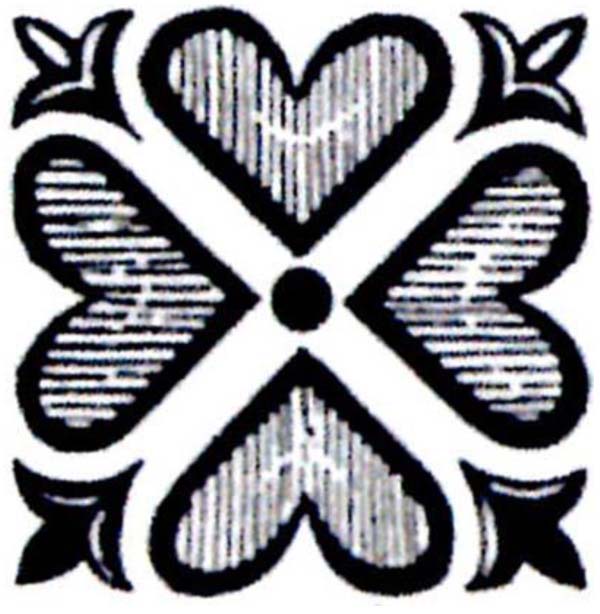
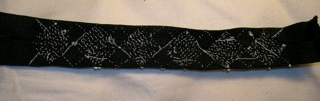
The original image of the Byzantine Rose motif, as copied from Herbert Norris’ Ancient European Costume and Fashion page 27. Back of trim piece, showing stitchwork.

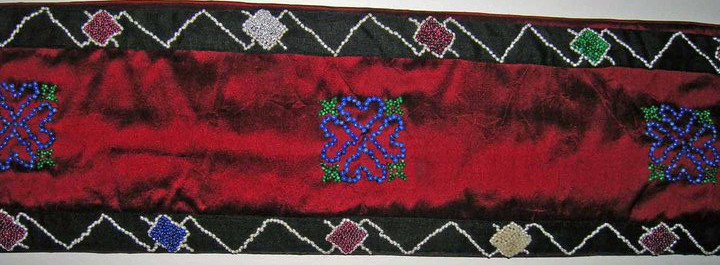
Finished Pallium front piece. Center Detail, showing roses and trim.
Top Detail, showing linen strap, rose and trim work.
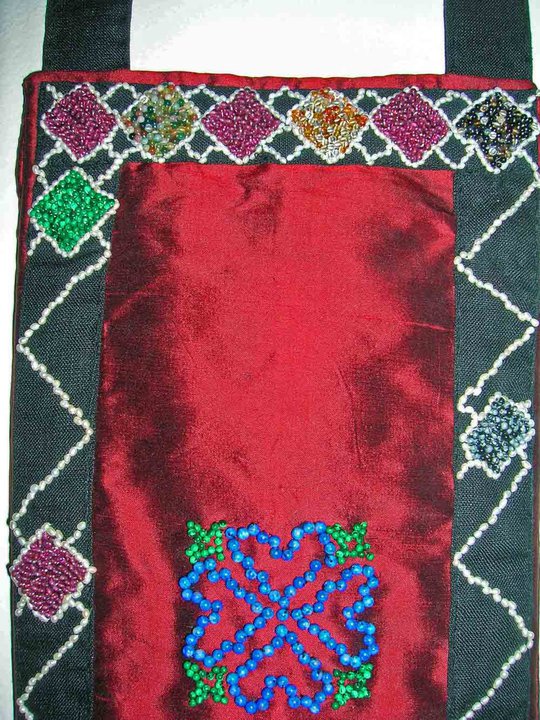
Put it all together and you get: